[Revised 2025-07-06]
Generally, TESS light curves are accessible via the MAST portal, which provides references to FITS files containing light curves in the standard TESS-SPOC format, the QLP format, and other variations (such as TASOC). FITS files in the TESS-SPOC and QLP formats can be read using VStar software. However, some other useful software packages (e.g., MCV by I. L. Andronov) do not support FITS files.
To streamline the use of TESS data in programs that cannot directly read FITS files, an interactive Python script, TESSdata.py, was developed. It is a part of the 'Light Curve Viewer' project, and can be used completely independently.
The script requires the Lightkurve package, which can be installed using pip:
>pip install lightkurve
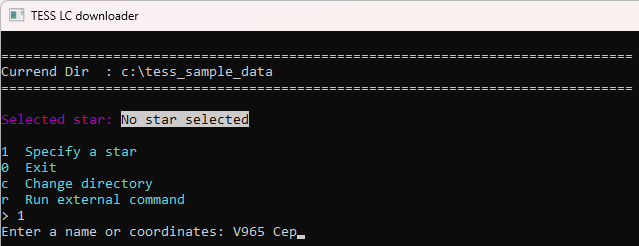
Upon launching TESSdata.py, the user is presented with the following text menu:
To select a star of interest, the user must press '1' and then ENTER. After that, they must enter either the star's name or its coordinates (RA and Dec):
After pressing ENTER, the program attempts to load a list of available light curves for the TESS mission. This process may take some time. If a network error occurs at this step, simply retry. Once loading is successful, the following extended menu appears:
Press '2' and then ENTER to view the list of available light curves:

To load one or more light curves, use menu options '3' or '4'. Option '3' loads observations as fluxes without any transformation. Please note that the units in which the fluxes are measured may vary depending on the data 'flavor' (see the 'author' column). Option '4' additionally transforms fluxes into TESS magnitudes, assuming that the median star magnitude corresponds to the TESSMAG parameter of the light curve. Note: Sometimes, the data contains negative fluxes (this is common in TASOC data). In this case, the conversion to magnitudes causes an error.
Let's load QLP light curves for sectors 58 and 59 as TESS magnitudes. To do this, press '4' and enter the numbers of the required light curves (found in the leftmost column of the table):
If a network error occurs, simply repeat the step.
After successfully loading the data, additional information appears at the top: the numbers of the light curves, the magnitude of the star, and other relevant details:
Now, the user can preview the data by selecting menu option '6'. An interactive plot will then be displayed:
To continue, close the plot window.
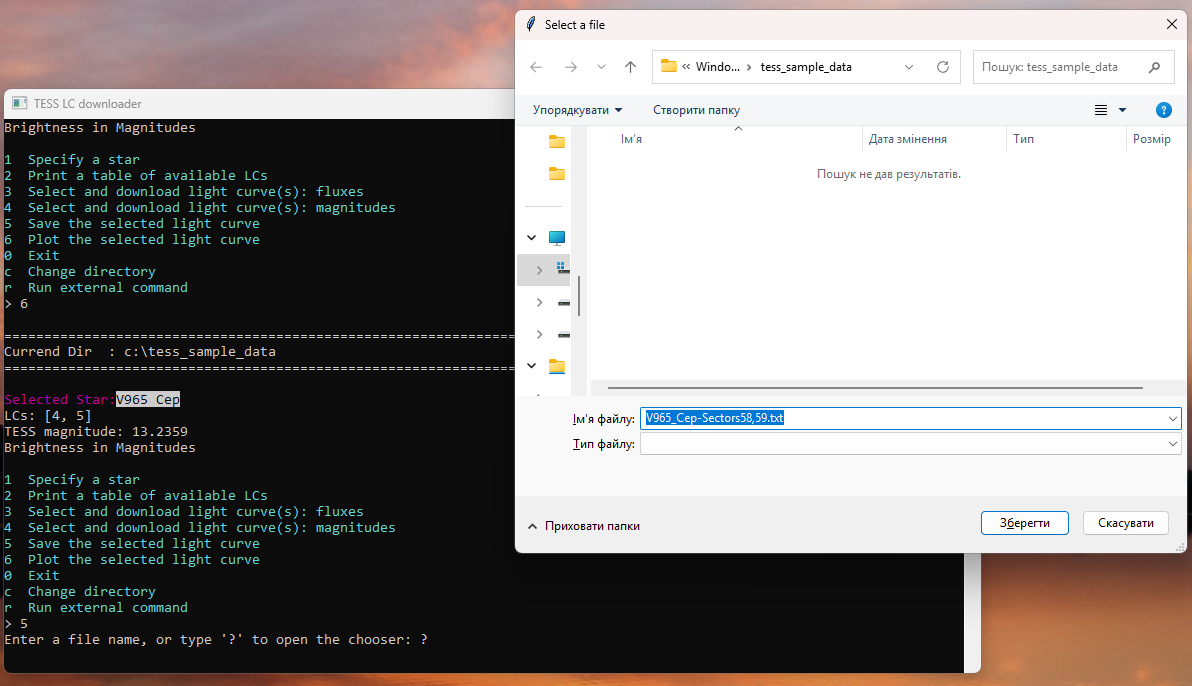
Now, the data can be saved to a text file. To do this, select menu option '5'. The user can either enter a file name directly or press '?' to open the file chooser:
The file is saved in text format, with an additional header that follows the Flexible Text Format used in VStar:
This format is recognized by MCV software:
Also, data in this format can be read by VStar (via the Flexible Text plug-in):
and LCV:
Note: The current version of TESSdata.py attempts to extract flux errors, which are converted to magnitude errors during the transformation to magnitudes. Lightkurve version 2.4.2 does not provide error values, whereas version 2.5.0 does.